Saturday, January 31, 2015

Pickled Eggplant


One of the simplest staples that was always around my house were my moms cured eggplants. As a kid I was disgusted by the very idea of squishy sour eggplants and I only started eating them around the end of high school along with a developing taste for everything bitter or sour.

I never had to make these when I was living in Israel, even after I moved out with my girlfriend and now fiancee. My mother was close by and I could have the original at least once a month. My better half never developed a taste for the squishy or the sour and I felt it a waste to make something that would be consumed only by me.

Living in NYC has driven me to create my own version of these amazing pickled eggplants and, while they are possibly not faithful to the original, they are incredible just the same. I usually serve them as a partner to my deviled eggs and you can have a taste of them as part of my Hungarian Dinner menu.

The Secret:
1. Salting and drying is important, give them enough time to drain.
2. Give them at least a day to pickle up, they last about a week before they get tired.
3. Don't be skimpy on the oil. Less oil doesn't make it healthier, if fried in deep hot oil less of it will soak into the eggplants.

What You Need:

2 Eggplants (the thinner the better)
1/4 cup of vinegar (simple vegetable white vinegar, non of the fancy stuff)
1 Tsp of Paprika (I like spicy, sweet works too)
2 Sliced and Peeled Garlic cloves
Canola Oil (or whatever kind you like to fry in)
2 Tbsp of Sea Salt

What To Do:

1. Slice the eggplants into 1/2 inch rings and toss them in a bowl with the salt.
2. Spread the rings over a baking net (preferably in the sun) for at least an hour.
3. Flip them over and give them another hour.
4. In steps 2-3 the eggplants were dehydrating and you will have a small pool of water under them. Soak whatever is left on them with a paper towel.
5. Heat oil in a pan, enough to almost cover the eggplants. It's warm enough when you dip one in and immediately see and hear the sizzle.
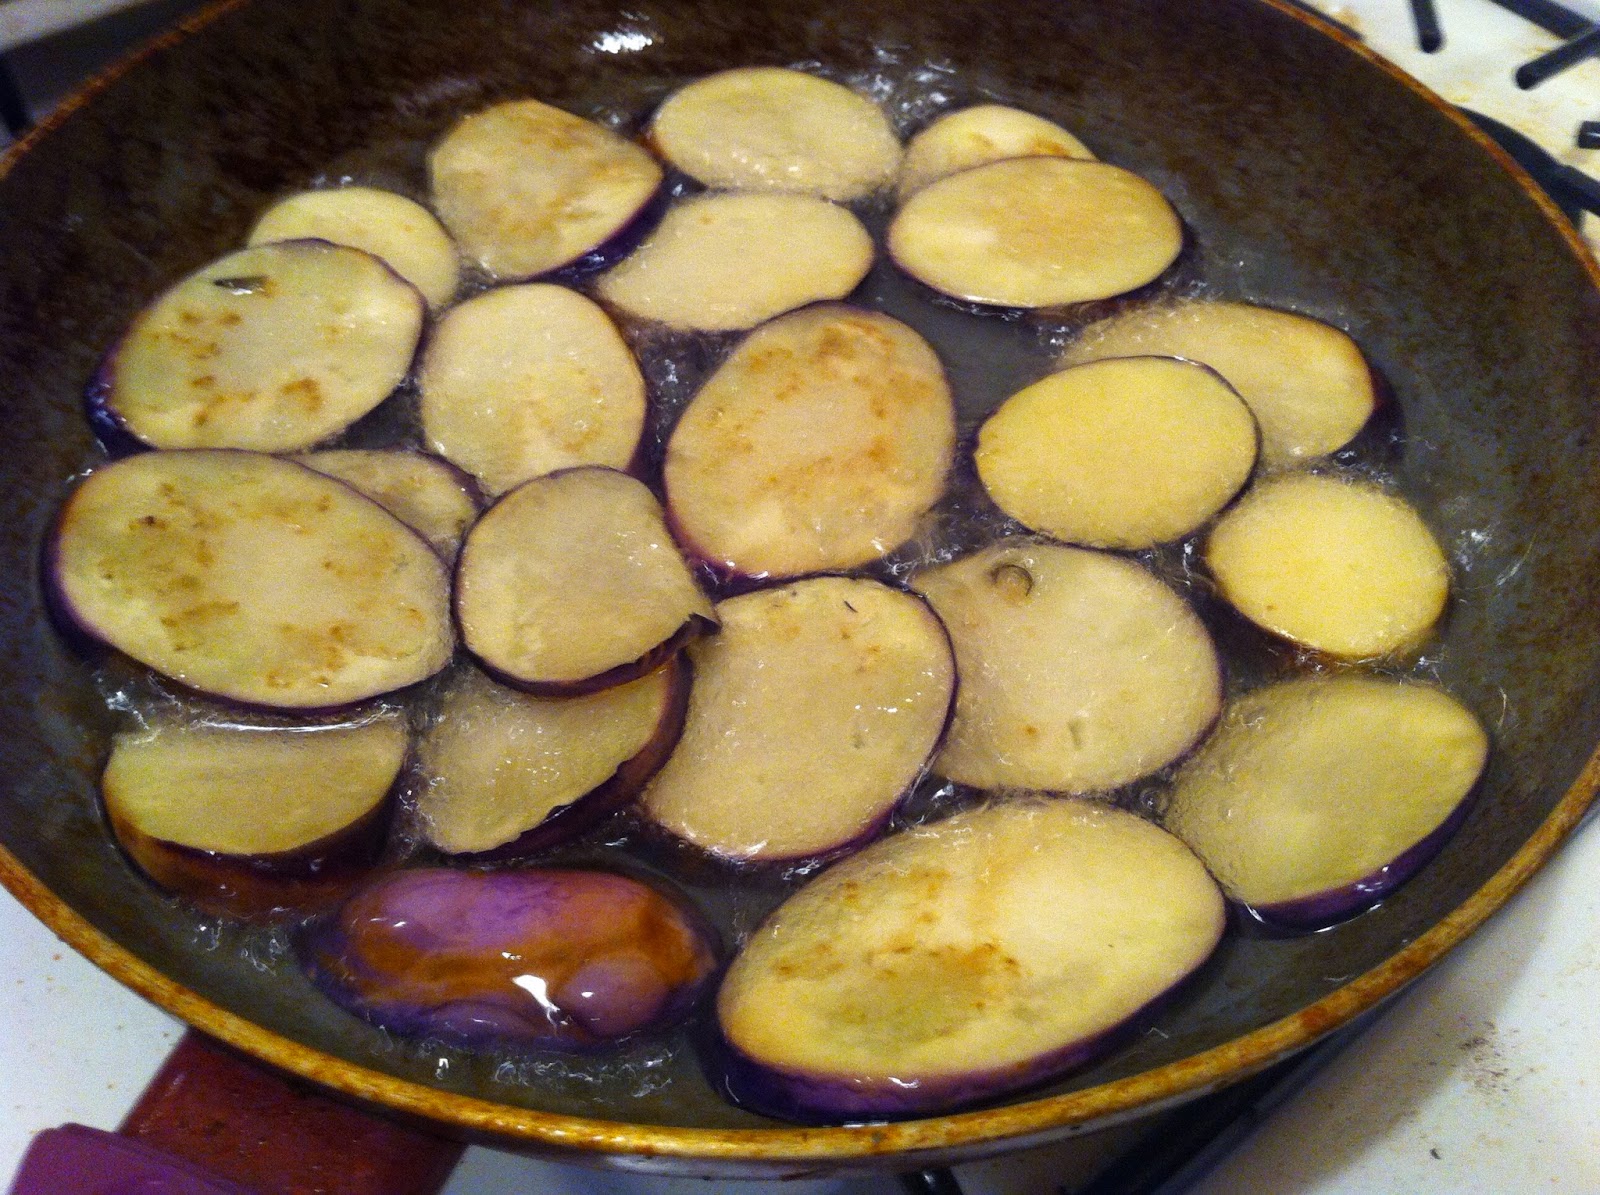
6. Put them in one by one so they don't over lap and fry for about 4 min on each side. They should look like this when they are ready to be flipped.
7. Lay them out on some paper towels to soak up the excess oil and repeat with the next batch.
8. Cool for at least 30 min.
9. In a small bowl mix paprika with vinegar and garlic.
10. Pile the fried eggplants in a small container and pour the mixture on top.
11. Cover and refrigerate.
12. At least once in the next 24 hours get the eggplants out of their container and flip the tower so the top ones get a chance to sit in the action juice.
13. Enjoy a wonderful eggplant that gets better everyday that passes in your fridge!

What Else?
Nothing else really, this is amazing because of it's simplicity. You could make a few deviled eggs to keep your eggplants company.


Monday, January 26, 2015

Pita Bread (The magic Balloon Show)

After this week's vegan brunch I got some requests to share my pita bread recipe. This simple bread is very easy once you get the hang of it and if you have a oven with a window you also get a free show. Making my own pita bread never occurred to me in Israel. This is something that is always available in the cheapest freshest ways wherever you are. This was until I spent the summer working as a personal chef on a small island off the coast of Maine. True you can find pita bread in the supermarket in a lot of places in the states but they are mostly the thin, dry and big-enough-to-wear-as-a-hat kind. Not my idea of a hummus worthy pita.

As a personal chef I like to create adaptations to my specialties through collaboration with the family. Hummus was requested one day and, this being something I love and have made many times, I was very happy to be making it, but what about pita? yeast and sourdough are no strangers to me but I had never attempted pita bread. I set to work and eventually came out with the most beautiful pita bread I had ever seen. Watching them blow up, setting them to cool and preparing this feast I remember being so proud of myself. My skills had not failed me in these new waters.

I had been there for a few weeks and cooking everyday. These were friends of the family and I felt very comfortable. In my leniency, I had broken one of my biggest rules as a chef: Never serve something you are making for the first time.

We sat down to eat and discovered too late that, while they did look nice and tasted great, my pita bread had no pockets, and pita bread without pockets is just... well.. bread. They did not seem to mind but I was heart broken.

A few years have gone by and I have cracked the secret of the pocket which I will share with you today:

The Secrets:

1. The stickier and softer the dough the harder it will be to work with and the better your Pita will be.
2. The pocket happens with the intense heat from the baking surface. Preheat your baking pan, use a stone or even cook them on the stove in a frying pan.
3. Let them steam for a bit in a container or bag after their ready so they got softer, too long and they'll get wet.

What You Will Need (For 8 Pita)

3 Cups of white flour
1 1/4 Cups of water (if the water is too hot it will kill your yeast)
1 Tsp. of dry yeast
1 Tsp. of salt
1 Tbsp of sugar
1 Tbsp of oil (whichever you like, I use olive)


What To Do


1. In a large bowl mix a 1/4 cup of water with the sugar and dry yeast until the yeast melts.
2. Add flour, salt and 1 cup of water and work until consistent. You might feel like the dough is too soft or sticky at this point but trust me it will work out.
3. Put the oil in a clean bowl and roll the dough in it so you have an oil covered ball of dough. cover with a damp kitchen towel and let rise for 45 minutes.
4. Work the dough with your hands and stretch into a tight ball this time. the oil should dtill be there helping you so there is no need for more flour at this point. If you don't know how to stretch dough into a ball you can flatten it and fold the edges in like a candy wrapper, then flip it over so to smooth side is on top. Cover with the towel and let rise for another 30 min.
5. Preheat oven with a large pan inside to 450 F. Heating the pan is super important.
6. punch the air out of the dough and roll it into 8 balls of more or less equal size, let rise on sheet of baking paper and let rise for 10 min.
7. Flatten balls using a small plate or a rolling pin, it's important that the height of the pita is even all over. Place straight onto the preheated pan that's already in the oven for 7 minutes. Make sure the side of the pita that was the bottom when it was rising will be the top when it is baking. If you cannot fit them all in one go that's ok but only flatten the balls right before baking them.
8. The Baked pita bread should be closed in a container, a covered bowl or a paper bag for about 10 minutes after the come out of the oven. I like to wrap them in the towel I used to cover the dough. This steams the typical hard crust of bread into the soft shells we love on our pita bread.
9. Don't forget to take them out of  the container after ten minutes or your pita bread will end up swimming in a bowl of water.

What Else?
you can make these on a hot pan on your stove, just rub the pan with a bit of oil first and get ready to bake one by one. This is especially fun to watch.
I also like to make 12 balls instead of 8 for the mini size vibe.
You can also change 1 cup of white flour with whole wheat or rye.


Thursday, January 22, 2015

Dana's Favorite Cookies

When me and my girlfriend first moved in together a few years back we were living in the most horrible little house imaginable. Everything was falling apart, the electricity was running through the shower, the ceiling in our bedroom was floating foam and non of the doors closed all the way. The mice were digging holes through the walls faster then I was closing them up.

It was important to me in contrast to this to always have sweet treats available for guests, trying to maintain some kind of a homey atmosphere. I set to finding the perfect simple chewy and soft chocolate chip cookie. After a few experiments I was happy so I started making batches of about 60 cookies each time and putting them in jars. Somehow it didn't matter how many cookies I made when people came to visit the jars were empty.

I've always been the type of person to have my cookie when the time is just right, a cup of coffee in the morning or with tea at the end of the day. One is usually enough. My wonderful girlfriend explained to me that I was not a normal human being. That most people, herself included, are always in the right mood for a cookie. As long as there are cookies, she would continue eating them. 

And so I stopped stocking them in jars and stuck to baking about 12 cookies on the spot when they were needed and still do to this day. These are perfect for that because they are so easy they can be ready to consume in 30 min tops.

The Secrets
1. Do not over work the dough, little lumps of butter do the cookies a great service while baking.
2. It's all about timing, they might look too soft when you take them out of the oven but trust that they will cool and stabilize.


What you will need (for about 30 cookies)

2 1/4  Cups of Flour
Tsp Baking Powder
1 Cup Of Sugar
1/2 Cup of Brown Sugar
Pinch of Salt
2 Large Eggs
1 Cup of Cold Butter cut into small squares
Tsp of Vanilla Ext.
200 g/0.44 Lb Dark Chocolate

What To Do

1. Excluding the chocolate, put everything else in a large bowl and start working it with you hands making sure to mush the butter in. Work it until you have a consistent cookie dough but don't worry about little lumps here and there, leave them.
2. You can use chocolate chips but the bigger the chunks are, the better the cookie. I like to take the chocolate in the wrapper, bang it against the counter or bang it with a rolling pin, and then unwrap it. Go ahead and throw those into the dough and work it just enough so the chocolate is distributed evenly. 
3. Roll ping pong ball sized dough balls between your hands and put them on an oven tray on a piece of parchment paper. They need to be about 2 inches away from each other because they will flatten out a bit.
4. Bake in a preheated oven at 375 F for 11 min. They should be soft and unstable but make sure they don't still have a spot in the middle that looks a bit runny. 
5. leave them to stabilize on the tray for about 3 min and then carefully move them with a spatula to a cooling rack for 5 min more.
6. enjoy!

What Else?

These go great with white or milk chocolate as well. Mix all three and take a pic of how happy you were when you took a bite!

Let me know how it turned out and share your simple cookie story.